

In the fast-paced world of e-commerce, providing a smooth and secure payment experience is paramount for online businesses. As a WordPress WooCommerce user, you have a powerful ally in achieving this goal – the integration of the PhonePe payment gateway. PhonePe, a popular digital payment platform in India, enables customers to make transactions effortlessly and securely. In this article, we will guide you through the process of integrating PhonePe with your WordPress WooCommerce store, ensuring a seamless payment experience for your customers.
Why Choose PhonePe for Your WooCommerce Store?
Widespread User Base:
PhonePe boasts a large and diverse user base in India. By integrating PhonePe as a payment option, you tap into a vast market, potentially increasing your customer reach and conversion rates.
Secure Transactions:
Security is a top priority in online transactions. PhonePe employs advanced encryption techniques and secure protocols, ensuring that your customers’ sensitive information is protected during the payment process.
User-Friendly Experience:
PhonePe offers a user-friendly interface, making transactions easy for both tech-savvy users and those new to online shopping. This can enhance the overall shopping experience on your WooCommerce store.
Step 1: Sign Up with PhonePe:
- Visit the PhonePe Business website and sign up for a merchant account.
- Complete the verification process to ensure the security of your transactions.
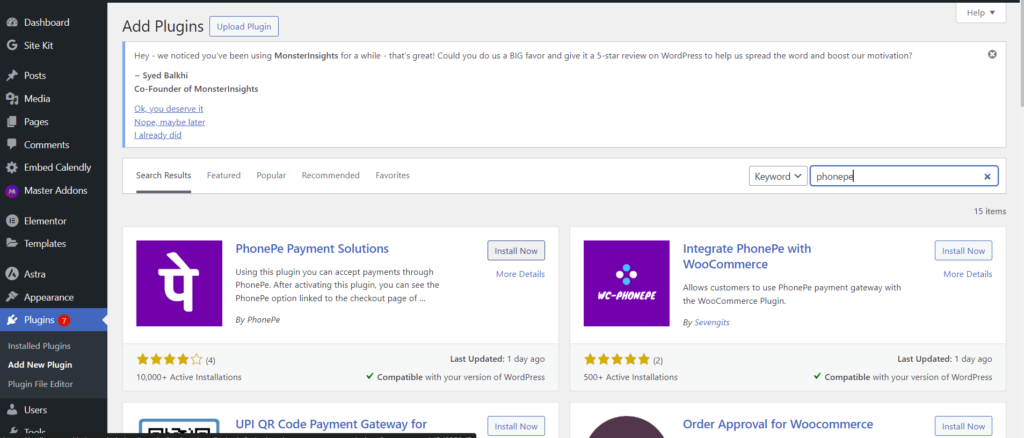
Step 2: Install Phonepe Plugin:
- Log in to your WordPress admin dashboard.
- Navigate to the Plugins section and click on “Add New.”
- Search for the “PhonePe Payment Solutions” plugin, install it, and activate it.
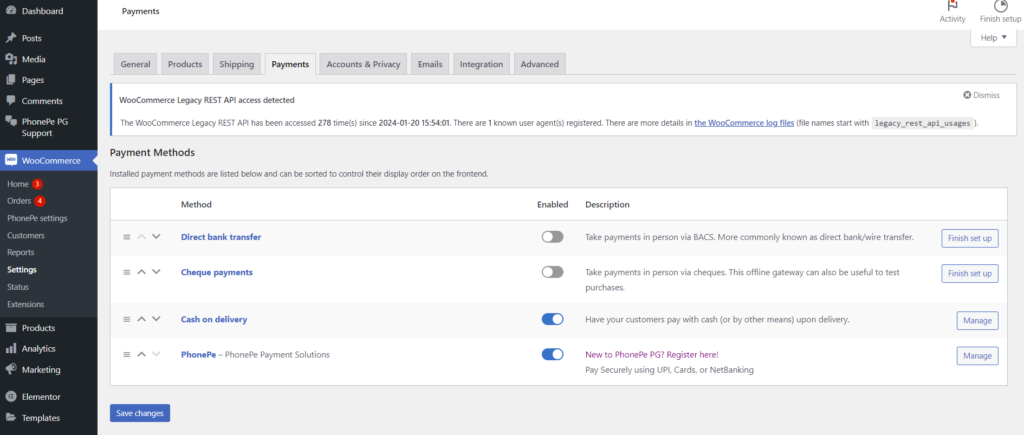
Step 3: Configure PhonePe Settings:
- In the WordPress admin dashboard, go to WooCommerce > Settings > Payments.
- Enable the PhonePe option and enter the necessary credentials provided by PhonePe during the registration process.
Step 4: Adding Test KEY:
- Before making PhonePe live on your store, perform test transactions to ensure the integration is working smoothly.
- PhonePe provides sandbox environments for testing purposes. Utilize these to simulate transactions without any real money involved.
Step 5: Go Live:
- Once you’re satisfied with the test transactions, switch PhonePe to live mode in the plugin settings.
- Update your store to make PhonePe visible to customers during the checkout process.
Step 6: Communicate with Customers:
- Inform your customers about the addition of PhonePe as a payment option.
- Highlight the benefits of using PhonePe for transactions on your WooCommerce store, such as faster checkouts and secure payments.